Category: Food

  • 螞蟻上樹

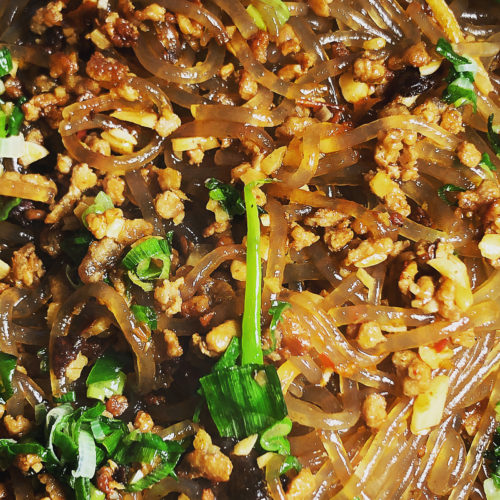
    Growing up, I had heard about 螞蟻上樹 but had never had it. In my mind, I pictured something like ants on a log with raisins on celery sticks filled with peanut butter. But, it is a real Sichuan dish, which I found in the the re-issued edition of The Food of Sichuan by Fuchsia Dunlop.

    I used Korean sweet potato starch noodle, just because it was what I had on hand. However, one bundle of noodles was quite large, and threw off the recipe. I had to make some adjustments to compensate, as well as add some additional seasonings because my pixian broad bean paste was not as red as the version I saw on YouTube.

  • Stir-Fried Lotus Root

    I prepared this dish based on the Caramelised Lotus Root recipe from Kylie Kwong’s My China with some substitutions and modifications.

    • 3 pieces of lotus root, peeled and sliced thinly
    • peeled and sliced ginger
    • 2 cloves of garlic
    • garlic olive oil
    • 1 tbsp brown sugar
    • 2 tbsp shao hsing wine
    • 1 tbsp chinkiang vinegar
    • 2 tsp soy sauce
    • 1 tsp chili oil with black bean
    • chili oil
    • fresh herb, such as cilantro or basil

    Add oil to a hot wok. Once the oil is heated, add the ginger and whole garlic cloves, and stir-fry until toasted and fragrant. For that extra boost of garlic flavor, I add a splash of garlic olive oil, which is sold at Costco. Next, I stir fried the lotus root for a few minutes, before adding the sugar, wine, vinegar, and soy sauce. The sugar and vinegar gives it a pleasant sweet-and-sour flavor. Kylie’s original recipe called for 1/4 cup of brown sugar, which I thought was a bit excessive. I ended up closer to the 2-3 tsp mark, and you can always add a bit more at the end if the balance between sweet and sour is off.

    As the lotus root caramelizes, add 1 tsp of chili oil with black bean. I use the 老干妈 (laoganma) brand and stir fry for another minute. I finish the dish with some additional chili oil, and then some chopped fresh cilantro or basil leaves, depending on what I have on hand.

  • Dry Roasted Cauliflower

    After having 干锅菜花 at a few Chinese restaurants, I’ve worked on a home version of my totally non-authentic dry roasted cauliflower. First, I start off with Chinese cauliflower, which I found available at select 99 Ranch markets. I’ve been finding it consistently at the Cupertino and Mountain View stores, but not the Foster City one.

    Ingredients
    Chinese cauliflower
    1 shallot, sliced
    1-2 chili pepper, remove seeds and sliced.
    2 Tbsp Shaoxing wine
    1 Tbsp Light soy sauce
    1 tsp sugar
    1 tsp Chili oil with black bean
    Hunan bacon 湖南臘肉, cut into slivers.
    1/4 tsp Chili oil

    1. Preheat a large cast iron skillet on low heat. I started with the 10.25-inch Lodge cast iron skillet, but switched recently to the 12-inch Lodge cast iron skillet. With 30% more surface area, I could precook all my cauliflower in one batch instead of two.

    2. Wash the cauliflower and cut it into bite-sized pieces. I then dry the cauliflower in a salad spinner so that the cauliflower will roast instead of steam.

    3. Add a thin layer of olive oil to the cast iron skillet. When hot, add the cauliflower. I leave the cauliflower alone for 5-10 minutes, allowing it to sear. As the cauliflower sears, I turn the pieces over and leave it undisturbed for a few more minutes. Repeat as needed. Once the cauliflower has been roasted evenly on all sides, remove it from the skillet.

    4. In a hot wok, add some oil and stir fry the sliced shallots and chili peppers. I’ve used red chili peppers or green jalapeños, sometimes even both. As the shallots caramelize, add a pinch of salt and sugar. Add Hunan bacon to taste and continue to stir fry. Add the chili oil with black bean. I use the Lao Gan Ma 老干妈 brand of chili oil with black bean sauce.

    I’ve been using the Hsin Tung Yang 新東陽 brand of Hunan bacon. I’ve found this in the refrigerated dried meats section at 99 Ranch and also in the dry goods shelves at Marina Food. I was perplexed, but the packaging states that it only needs to be refrigerated after opening. When refrigerated, the Hunan bacon gets hard and difficult to slice. Nowadays, I purchase a package of Hunan bacon and allow it to return to room temperature. I thinly slice the entire package and store it in a plastic food container in the refrigerator.

    5. Add the roasted cauliflower to the wok. Add the shaoxing wine, soy sauce and sugar. For this dish, I don’t use measuring spoons–just a splash her and a splash there. After stir frying for 2-3 more minutes, I start taste testing.

    First, I’m looking at the texture of the cauliflower. I want the cauliflower to be cooked, but still retain some crunch. I’ll take a bite and adjust my cooking times accordingly. Next, I’ll adjust the seasoning of the cauliflower to taste with more soy sauce or salt. Once the texture and flavors are to my liking, I add just a touch of chili oil. I recently started a new bottle of Hsin Tung Yang chili oil just for variety. I’ve also used the S&B La-Yu Chili Oil before. Each has its own taste, so use whatever you like.

  • Chinese Sous Vide Beef Shank

    I’ve been making braised beef shank for many years, but the end product had never quite matched the description in my cook book. I’ve tried braising in a cast iron pot for 2 hours. I’ve also left the beef shank in a crock pot for 8 hours. In the end, I’ve never achieved the jellied braising sauce until now.

    To start, I adapted the braised beef shank recipe from Ken Hom’s Fragrant Harbor Taste. I vacuum sealed the following ingredients in a FoodSaver bag, and let it marinate for a few hours.

    1½-2 lbs of beef shank
    6 star anise
    2 Tbsp whole unroasted Sichuan peppercorns
    2 oz rock sugar
    3 Tbsp dark soy sauce
    1½ Tbsp light soy sauce
    4 slices of ginger
    2 two-inch sticks of cinnamon
    2 tsp five-spice powder

    Next, I cooked the beef shank at 175°F for 16 hours. When the beef shank was done, I removed it from the bag and filtered the reserved juices. For the first time, the braising sauce coagulated from all the gelatin extracted from the shank. The meat was incredibly tender.

    Beef Shank Sous Vide

    I sliced the beef shank thinly, added a dab of hoisin sauce, and wrapped it all up in a green onion pancake.

  • Lima, Peru Chinatown

    I’m not a purist when it comes to Chinese food. Having grown up in America in the 1970s, I am accustomed to food that doesn’t taste quite like it does in China or Hong Kong. However, nowadays, the options are plentiful and the quality is much improved. When dining out in Chinese restaurants, we even have a selection of different regional cuisines. Yet, old school Chinese restaurants still have a place in my heart.

    In a recent adventure to Peru, I could not pass up the opportunity to see the Lima Chinatown. A traditional gate marks the entrance to Chinatown. On it are the characters 中華坊 China Square.

    Lima, Peru Chinatown

    Although the guide books refer to the neighborhood as Chinatown, that would be a term foreign to taxi drivers. The sign posts call this place Barrio Chino.

    Barrio Chino

    Without a fast data signal, I had to pick a restaurant for lunch by appearances. I saw a lot of ground-level cafes that seemed to offer fast food; i.e., fried rice or noodle plus one protein. Not what I was looking for. Instead, we ended up at Restaurante Salón China (中華樓), which is located on the second floor above a small street-facing bakery. On one side was the buffet offering and on the other side were the few people who were ordering off the menu. Of course, we opted for the traditional restaurant service.

    I often joke that I know restaurant Chinese. After all, outside of the house, ordering food at a Chinese restaurant is the only time I ever use Chinese. Well, my restaurant Chinese skills were put to the test because the menu was in Chinese and Spanish. Usually, the fastest way for me to order is to read the English translation and then confirm with the Chinese text to make sure I’ve ordered the correct entrée. No such luck here.

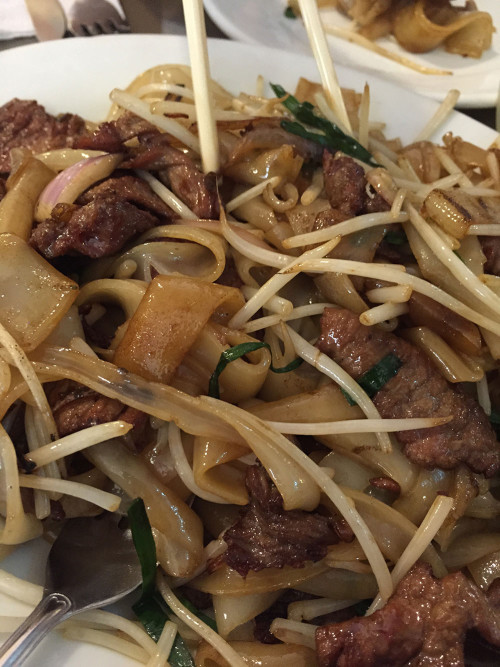
    This was the first Chinese restaurant that I’ve been to where the waiter did not speak Chinese. Fortunately, he did speak English, and even knew the names of the dishes in Cantonese. In fact, at first, I had ordered a different beef and noodle dish, but he suggested the beef chow fun (乾炒牛河) dish instead, which came out remarkably well. The flavors were spot on.

    Beef Chow Fun

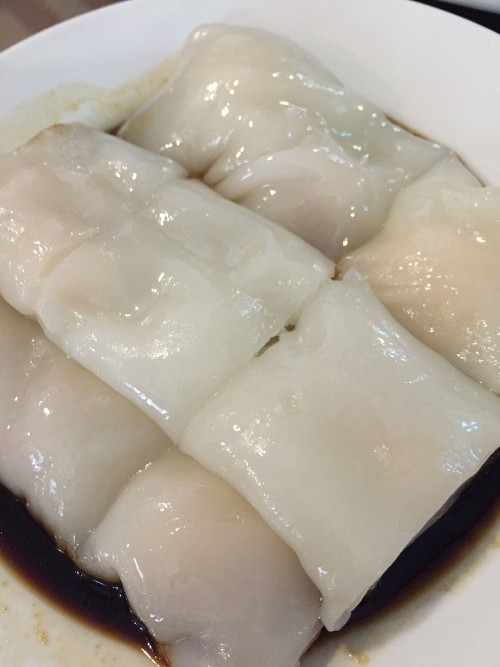
    At this point, we were very optimistic. The shrimp cheong fun 蝦腸粉 looked exactly the same as you would get in America.

    cheong-fun_1657

    The egg tart 蛋撻 could have been better. That’s not to say that the kids turned it down, but I’ve had and seen better on many occasions.

    egg-tart_1660

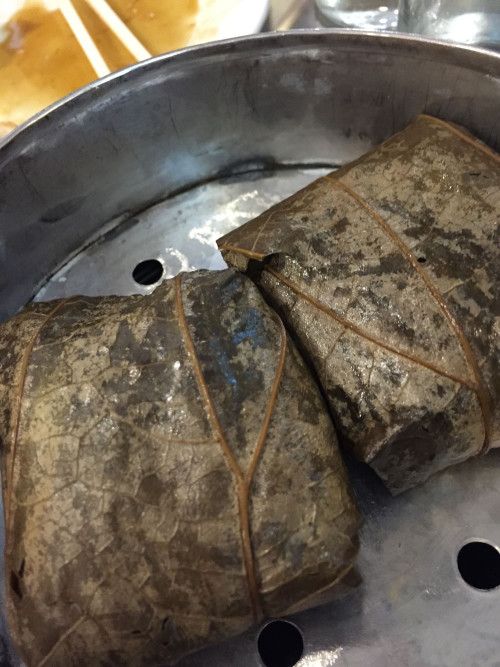
    The glutinous rice 糯米雞­ was popular with the kids.

    sticky-rice_1664

    The bean curd skin roll 腐皮卷 was popular with the adults.

    bean-curd_1665

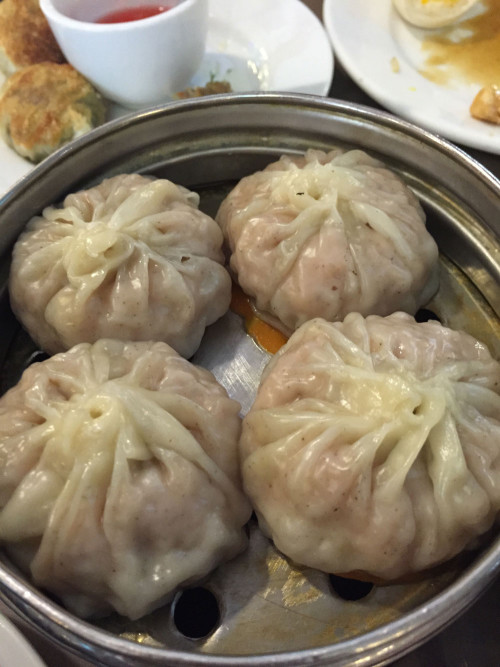
    The least liked item was the Shanghai dumpling 小籠包 which was really off in terms of size. There was nothing 小 (small) about the 小籠包. Maybe that was my fault for ordering a Shanghai dish in a Cantonese restaurant.

    XLB_1663

    Overall, I was very impressed with the restaurant. It had its highlights, service was attentive, and the exquisite beef chow fun made me feel at home. I didn’t stay in Lima long enough to fully explore the city and see if the best Chinese restaurants are outside of Chinatown, like they are in California. Considering our location, it was a pleasant surprise, and we even received a free Chinese calendar at the end of our meal.

  • Green Onion Pancake Recipe

    This is my way of making green onion pancakes or 葱油饼. It is not the traditional way.

    1. Boil a cup of water.

    2. Measure 10 oz. of all purpose flour and pour into a food processor.

    I don’t use anything special. Just the industrial size bag of flour from Costco. I’ve tried countless green onion pancake recipes, and never without success. The pancakes would always end up hard like a cracker, so I abandoned the printed proportions and made the dough by sight and touch. Better, but inconsistent. After reading The Science of Good Cooking by Cook’s Illustrated/America’s Test Kitchen, which explained how measuring flour by volume was imprecise, I switched over to measuring flour by weight. My dough is now consistently soft.

    3. Measure 6.25 oz. of boiling water, slowly pour it into the food processor as it is running, and let it run for a few minutes after the dough has come together.

    I place a liquid measuring cup on the kitchen scale, zero it, and then ladle the boiling water into the measuring cup. The pyrex measuring cup makes it easy to pour the water into the food processor. After the dough comes together, I let the food processor run for about two minutes. The end product looks something like this:

    green onion pancake dough

    Note: 6.25 oz is about right for the 25 lb bag of Costco flour. I recently switched to the smaller 2-10 lb bags of organic unbleached all purpose flour (also from Costco). I had to add a touch more water–6 3/8 oz–or else the dough ended up a bit dryer.

    4. Remove the dough and knead it a few time. Cover the dough and let it rest for 20 minutes.

    In a small rimmed baking sheet, I add a bit of flour. I use a rimmed baking sheet just to keep the flour from getting everywhere. I also dust my hands with flour and remove the dough from the food processor. On the baking sheet, I knead the dough a few times until it is in the shape of a ball. Use just enough flour to keep it from sticking. I then line a large bowl with a sheet of parchment paper, drop the dough ball inside, and cover with plastic wrap.
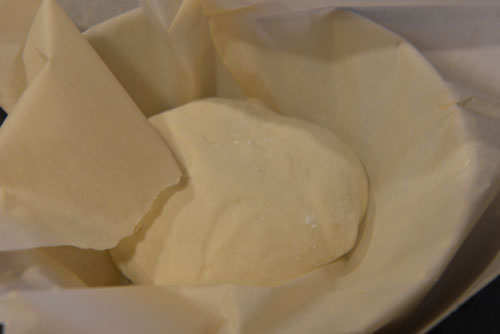
    resting dough

    5. Chop the green onions and clean up the food processor.

    Now is a good time to clean up the food processor before the remnant dough dries out. Also, chop about 2-3 stalks of green onion.

    6. After 20 minutes, cut a wedge of dough. Heat up a flat bottom pan on low heat.

    I had a sharp scraper that came with the food processor. I cut a wedge that is 1/6th of the dough ball so that I end up with six green onion pancakes. Now is a good time to heat up a pan. I cook my pancakes on low heat. So some oil and let the pan slowly warm up.
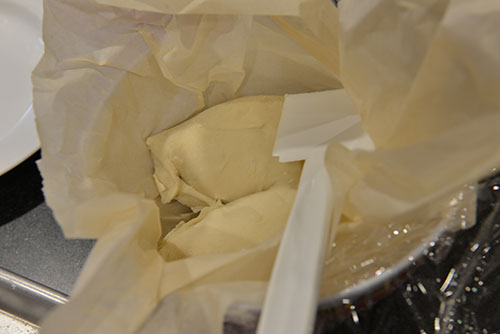
    wedge

    7. Roll the wedge into a ball, and then use your thumbs to press a dimple into the dough.

    Again, I dust my hands with flour, grab the wedge and shape it into a ball. I use my thumb to press down the center of the dough, while turning it around to make the center even. This is the non-traditional part. Every other recipe will tell you to roll out the dough, spread the green onion/sesame oil/salt mixture, and roll up the dough into a log. Then, coil it like a snail shell before flattening it again with a rolling pin. I’ve always had problems with the green onions bursting out and blackening during the cooking process so I do it my way.
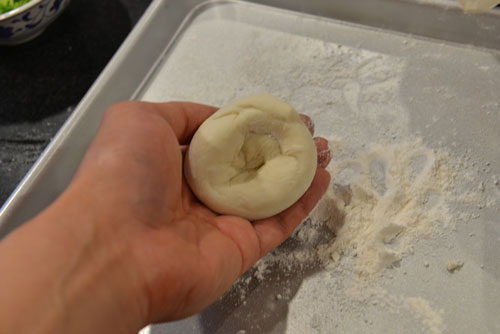
    dimple

    8. Fill the dimple with chopped green onions.
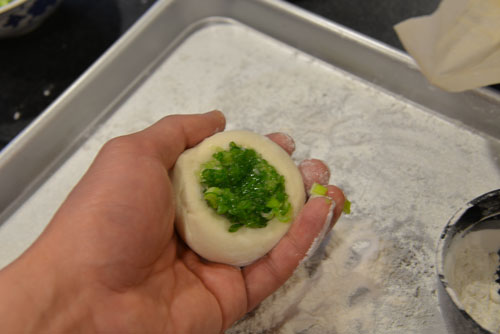
    green-onions

    9. Close up the dough.

    Hopefully, this part will not be too confusing. The best way to describe this is like if I were making a bun/bao. I pull up the opposite sides of the dough until the green onion is covered, pinch the top together, and give it a twist.

    round

    9. Add a pinch of kosher salt and gently roll out the pancake.

    Try to keep the green onions inside the pancake.
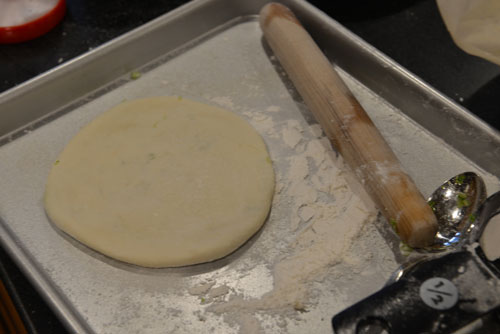
    flatten

    10. Cook the pancake.

    Hopefully, the pan is hot by now. I might 1-2T of oil into the pan. I just want enough so that the pancake is in contact with the oil so that it will cook evenly. I cook the pancake in a covered pan for a few minutes. It all depends on the heat of the pan. Once the pancake is cooked on one side (I go by looks), I might add some more oil back in the pan as I am flipping it over to cook the second side. Hopefully, the end product will look like this:
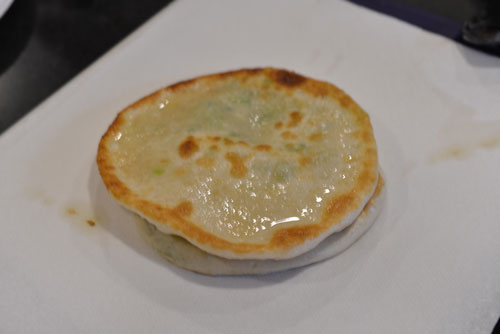
    green-onion-pancake

  • How to Make Naan

    It all started at Howie’s Artisan Pizza. I really loved their pizza crust. After buying a dough ball from them, I discovered how dough should feel in the hand: soft and malleable. In other words, I was not using enough water in my recipes. With this insight, I was finally able to crank out green onion pancakes (葱油饼) fairly consistently by relying on my eyes and sense of touch, instead of the measuring cup. Now, on to the naan.

    I started with Mark Bittman’s naan recipe from How to Cook Everything.

    2 tsp instant yeast
    2 Tbsp milk
    2 Tbsp yogurt
    1 Tbsp sugar
    4 C all-purpose flour
    1 egg
    2 tsp salt

    I’ve made this a few times. Bittman has a specific order for mixing some of the ingredients (i.e., yeast, milk, yogurt and sugar), but I was even more minimalist by adding all the ingredients (except for the water) together in the food processor with no ill effect.

    With 葱油饼, naan or pizza dough, getting the right amount of water is crucial. Too little and the dough is hard. Too much and the dough is wet and sticky. Better to get it right on the first try, than to tinker around and try to fix your mistakes. So, with the food processor running, stream the water slowly into the food processor until the dough comes together into a ball. The first time I tried this, I used warm water (like with 葱油饼) and the dough rose nicely. The second time, I tried making the dough in the morning with room temperature water and leaving the dough in the refrigerator all day to let it rise, as Bittman suggested. I’m not sure that the dough rose at all in the second instance, but the naan was just as delicious.

    Instead of an oiled bowl, I usually just place the dough in a bowl lined with parchment paper.

    After the dough has risen (or not), I slice a wedge of dough and shape it. For that piece, I think I added some chopped green onions.

    Here’s where I depart from Bittman. I have had no luck making the naan in an oven, even with a baking stone. The end result always ends up too dry. So, I tried it in a covered frying pan (just like with 葱油饼) with a touch of oil.

    A touch of butter at the end is optional. Maybe this is not authentic naan, but naan “with Chinese characteristics.” Regardless, the end result was pretty close.

  • Año Nuevo State Park, Pescadero, CA

    Inspired by AAA’s Top Beach Towns for Summer article in the most recent issue of VIA Magazine, I headed out to Pescadero for the first time. I first stopped at Arcangeli Grocery Co..

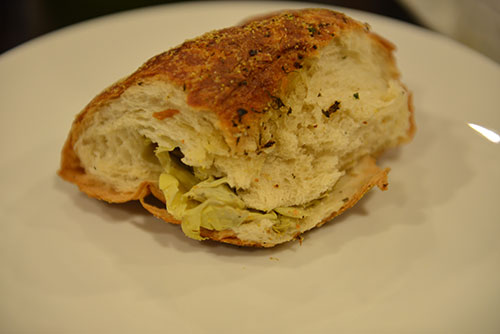
    The original plan was to picnic at Año Nuevo State Park; however, since it was already close to lunch, we ate at the picnic tables behind Arcangeli. We enjoyed two loaves of still-warm artichoke garlic bread, cheese, ham and turkey, all purchased from Arcangeli. After a day of adventure, we only had a small corner of bread left.

    Pescadero is not a big town. In fact, all the dining establishments mentioned in the VIA Magazine article are all on the same block of the same street. So, you can easily walk around town and find what you like.

    After our lunch, we headed off to Año Nuevo. Summer is the off-season for the elephant seals, so it was not crowded at all.

    From the visitor center, the path to the South Point and North Point viewing stations is quite picturesque.

    Spotted some red berries along the way.

    Usually, I only see pine cones on the ground. Here, the pine cones are visible on the tree.

    After a short hike, we arrived at the J. Thomas Staging Area. Beyond this point, you need a permit, which can be obtained at the visitor center.

    The path out to the viewing stations can be a bit tiring, with plenty of energy spent walking on the sinking sand.

    Before the seals were visible, I could already hear them barking. However, at South Point, I only spotted a handful of seals. Most of them were snoozing under the warm sun.

    The bulk of the seals were at North Point.

    Perhaps, just enough to make the experience interesting. While most the seals were relaxing on the beach, a few of them were mixing it up on land:

    and in the water:

    On the way out, we stopped off at this secluded beach.

  • National Rice Cooker Non-Stick Pan

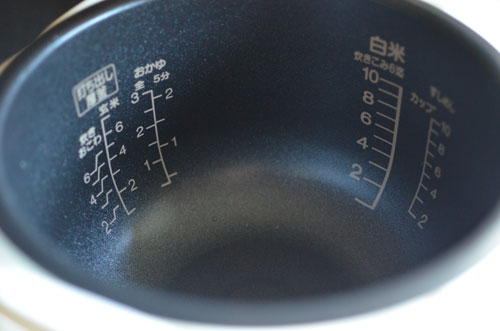
    Rice cookers are truly the work horses of the Chinese kitchen: toiling each day behind the scenes and maybe even taken for granted despite their constant effort to optimally prepare a bowl of rice. Our National rice cooker has faithfully delivered thousands of bowls of perfect rice over the years. However, it was beginning to show its age.

    The once pristine pan had accumulated some unsightly nicks and scratches in its non-stick coating. While purchasing a new rice cooker is one option, a cheaper alternative may be to just buy a replacement pan.

    So now, the rice cooker has a new non-stick pan which I purchased from the Panasonic. If your rice cooker pan starts wearing out, don’t forget to consider purchasing a replacement part instead of buying an entirely new rice cooker.

  • Momofuku Cookbook

    Last weekend, I found a copy of Momofuku by David Chang and Peter Meehan at the local library. It’s part autobiography and part cookbook with plenty of color and colorful language. While I’ve never set foot inside a Momofuku restaurant, I have read or heard quite a bit about their famous pork buns, so I decided to tackle that recipe first.

    The roast pork belly was simple to prep and cook. However, being an experiment, I did not cook the requisite 3-pound slab of skinless pork belly. Instead, I started with a 1-pound slab of skin-on pork belly, which was quite decent in size. I thought I would end up with more than enough roast pork, but the original square slab of pork belly reduced to a rectangular package of caramel goodness while in the oven.

    The tender pork was quite good, particularly when nestled between a steamed (store-bought) bun and accompanied by a smear of hoisin and shredded green onions. The first batch with skin-on was a bit too crunchy, so I removed the skin for the second batch. Needless to say, the port buns were well received. However, considering the amount of fat and oil that oozed out of that delicious slab of meat, I don’t see this dish making a frequent repeat appearance on the dinner table.

    The ginger scallion sauce was also well done. I love adding it to rice, noodles, and just about everything else. I’m still searching for a recipe that I can make repeatedly. Someone of the other recipes (Pig’s Head? Seriously?) seem totally off-the-wall for home chefs. I have to test some of the other recipes to see if I can find something more practical that would justify buying the cookbook after I return this current copy to the library.